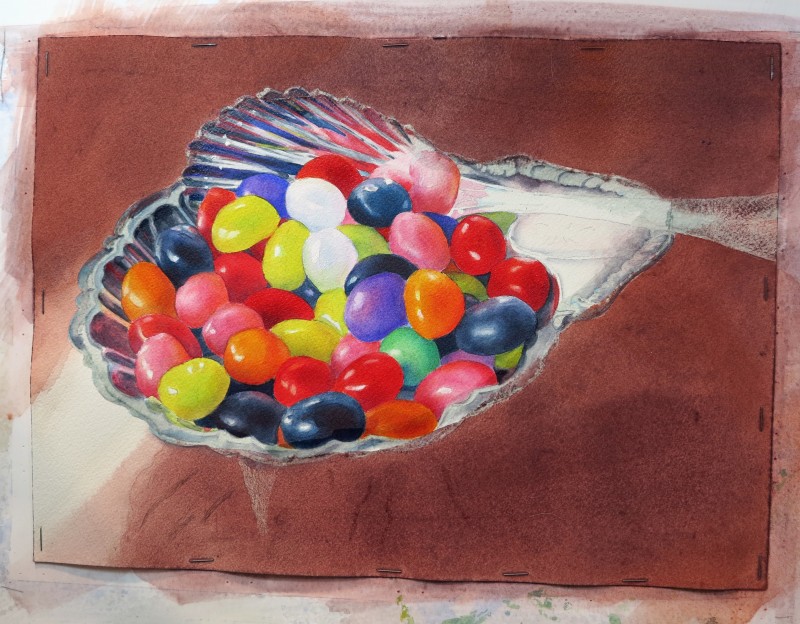
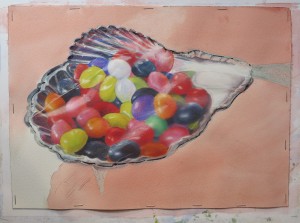
I completed the silver bowl using the alizarin crimson, jenkins green and indigo mix and added a glaze of red on the handle of the dish to separate it from the spoon. The bright white highlights on the dish were toned down with a pale wash of the silver gray allowing the brightest areas to be in and around the bowl of the spoon. Another wash of dioxazine purple was added to the background to darken it. Project complete, now I just need a title 🙂
Hey, back with some more jelly beans under construction. Time for some background work.
I began by covering the jelly beans and dish with Press’n Seal plastic wrap and sealing the edge with masking fluid. This can be a little tricky as the paint can sometimes leak under the wrap.
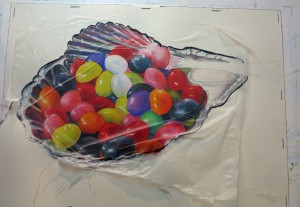
I traced the painted area on the plastic wrap with a Sharpie pen, then cut the plastic wrap and fit it over the painting. Using masking fluid I sealed the edges of the plastic wrap. You can also use masking tape (cut the plastic a bit smaller to allow room for the tape) and then cover the remaining exposed painted area with masking fluid. BE CAREFUL TO COMPLETELY COVER THE EDGES OF THE PLASTIC WRAP.
Next I put down a wash of Quinacridone Burnt Orange followed by several washes of Violet Oxide. After a few washes I realized I had a leak under my plastic wrap and needed to remove it. Apparently I did not follow my own instructions, Murry tried to warn me….
I decided I needed a little more red on top of the Violet Oxide so I put down a wash of English Red Oxide to bring out the color of the table.

With the base colors established I then began to work on how to create the wood grain in the table. I tried using plastic wrap, newspaper and paper towels to imitate the wood grain with no success.
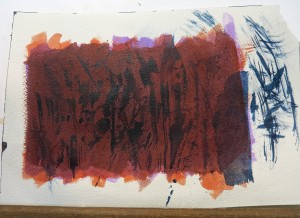
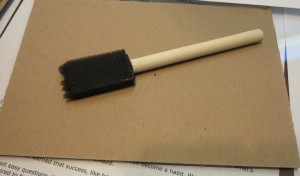
So what do you do when you do not have the answer? Google it. After doing some research I came up with a solution. I had some foam craft brushes on hand so I snipped out chunks at the end to make an uneven pattern.
Viola’!
I put a few more glazes of Violet Oxide and English Red Oxide on to soften the dark pattern.
Then I removed the remaining mask. Using a mixture of Sap Green and Dioxizine Purple I painted the shadow of the dish and put wash over the table area to darken it. A Sapphire Blue wash was used for the highlight to the left of the dish.
From here I will return to the silver nut bowl, finish the spoon and bowl, refine the jelly beans and continue to darken the table and blend the highlight into the background.
See you in class!
Posted on Monday, February 17, 2014 at 9:48pm
Filed in
Uncategorized
Comments Off on Jelly Beans – More WIP
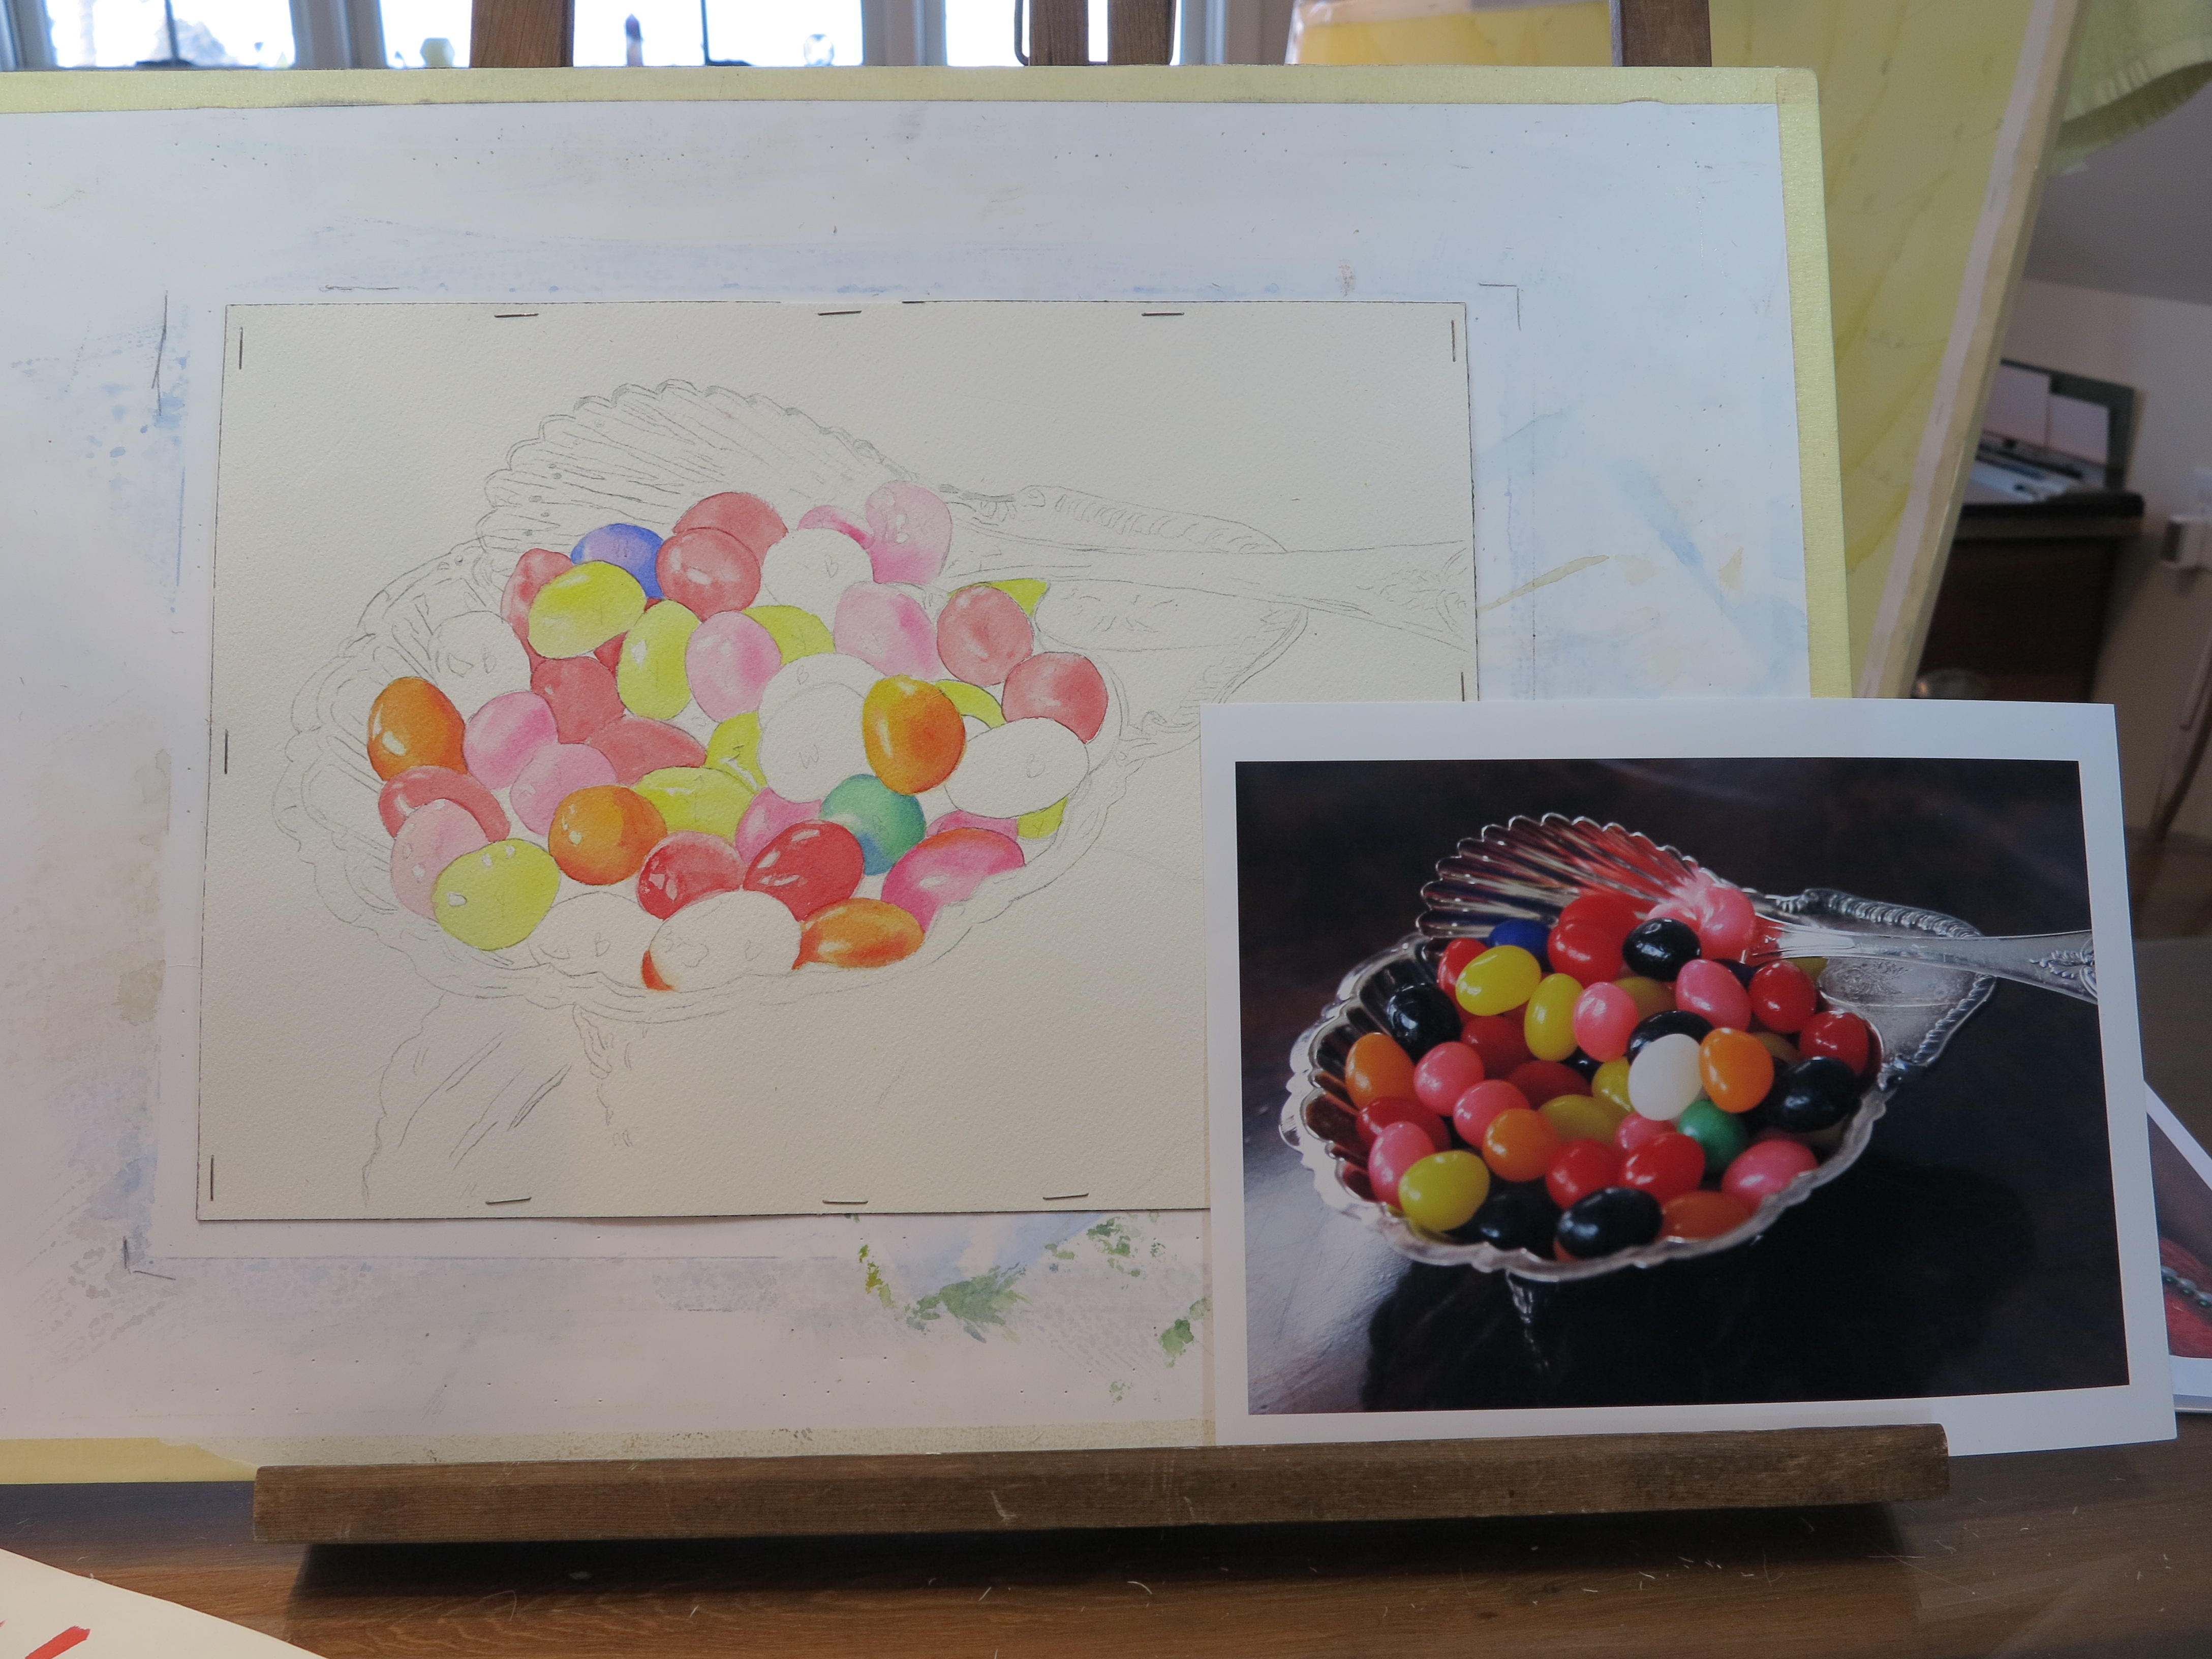
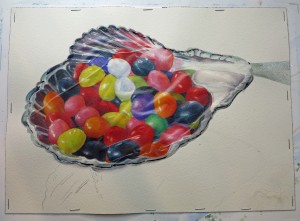
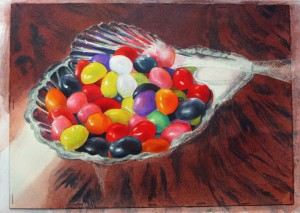
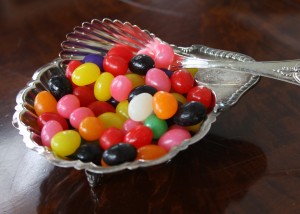
We have been painting jelly beans in a silver nut dish in class the last few weeks. Let me take you through the process. First the reference photo, this will be fun to paint, all those colors and reflective surfaces. It looks difficult right now but when it is finished my students will be proud of all their hard work.
I am using fluid acrylics on 140 lb cold press 10 x 14 paper. Colors being used –
Hansa Yellow Medium
Transparent Pyrolle Orange
Dioxazine Purple
Quinacridone Red
Pthalo Blue (Red Shade)
Pyrolle Red
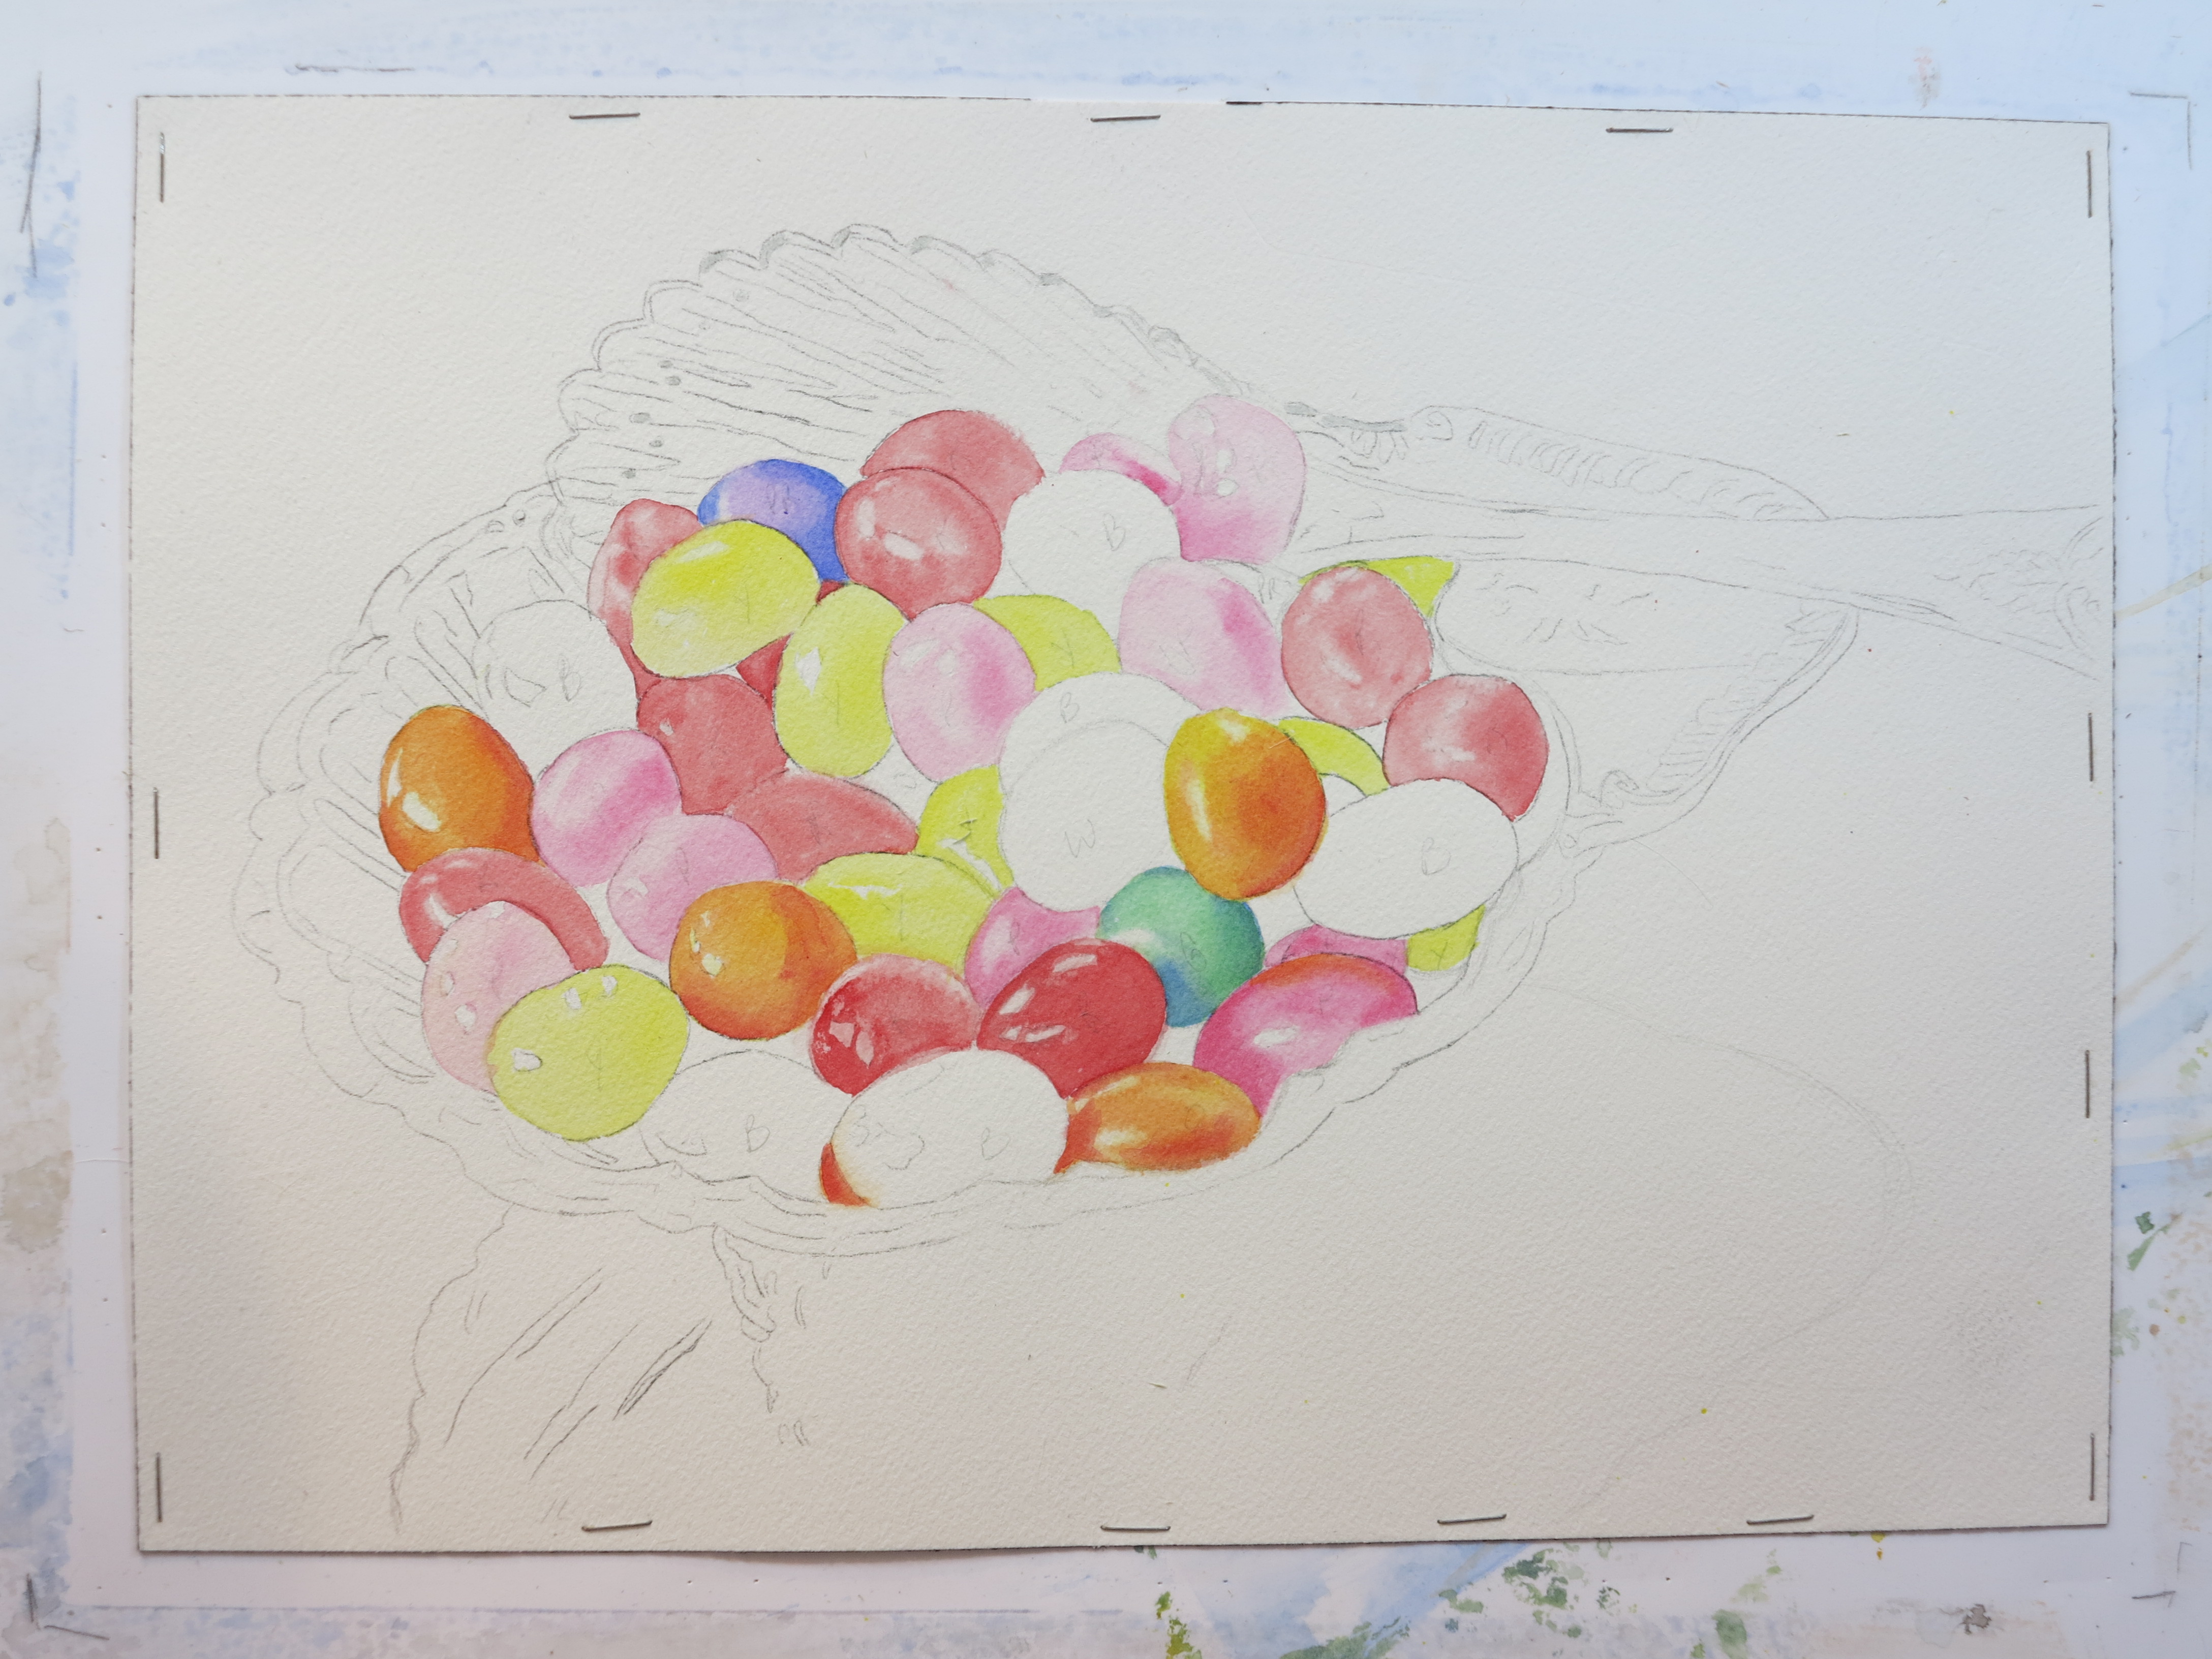
We began by painting the jelly beans first, which is always the most fun. I painted each bean with a light local color wash .
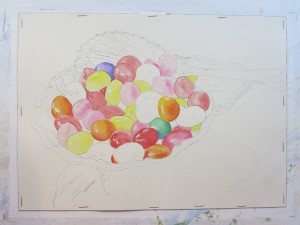

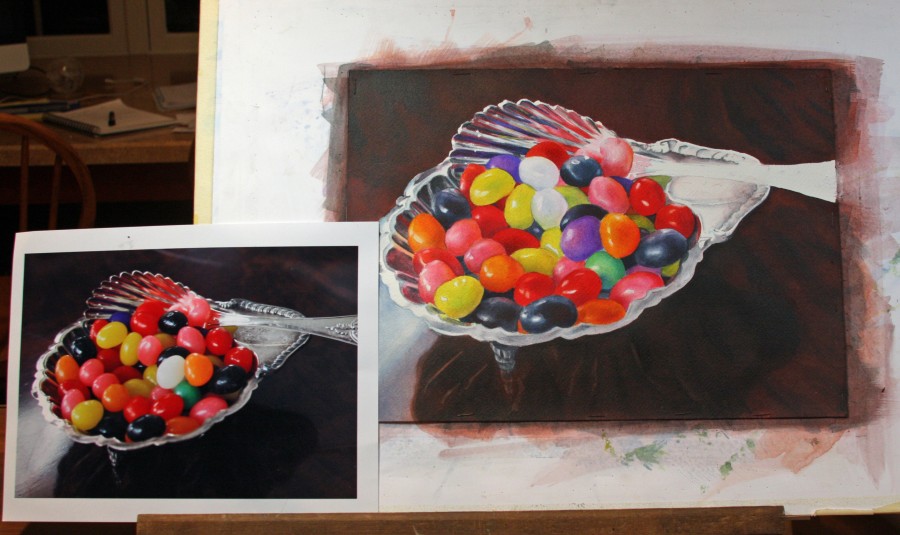
After studying the reference photo I decided I didn’t like the two red jelly beans at the top of the pile directly in front of the spoon, they were too dark and did not allow for a center of interest. Using some Daniel Smith watercolor ground I covered the red and pink jelly beans and finished painting the remaining beans before deciding what color I wanted to use.

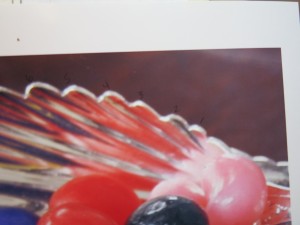
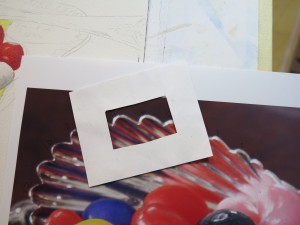
In the meantime I started putting down some of the colors in the spoon. Attempting to follow the intricacies of the reflective colors in the spoon was a bit daunting so I blew up the photo and numbered the flutes on the spoon. I also used a square of paper with a ‘peep hole’ cut out in the middle to use as a guide.
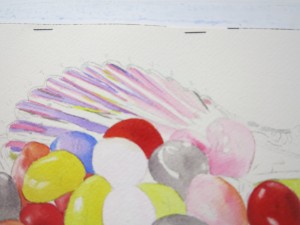
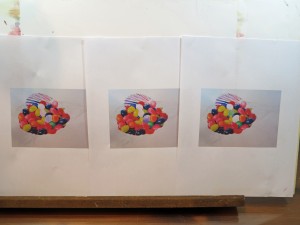
When unsure of what color I want to use in a painting I will often print off several photos of the painting in progress and use colored pencils to experiment with various colors. Sometimes if I’m really feeling adventurous I’ll use photoshop, however that usually ends in total frustration! Colored pencils are way easier 🙂
I decided to paint the white bean in the front purple, a compliment to the neighboring orange bean, and then the two remaining beans will be white which will draw the viewers eye to the spoon. However, white is never just white, there will be various colors from neighboring beans reflected in the white.
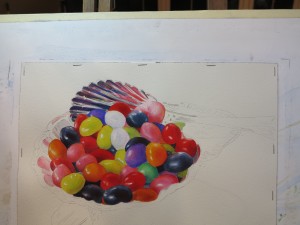
I am now in the process of painting the silver nut dish, working my way around. I am using a mix of Alizarin Crimson, Jenkins Green and Indigo for the silver grey in the bowl.
Stay tuned.